Showing posts with label pearl. Show all posts

Friday, November 6, 2015

Merry Christmas Card with Washi Tape and Christmas Tree with Tutorial

I'm Card Captain of the enjoyMichaelStrongstamps Yahoo Group for this week, so for 5 days I'll be showing you several works using Michael Strong's stamps. I hope you'll find them inspiring.

My 4th card for this week is a Merry Christmas Card with Washi Tape and 
Christmas Tree.

It is followed by a step-by-step tutorial, with photos.

I hope you'll try it and enjoy it… It takes less time to make the card than to post 
about it (lol)


Today's card is all about making the background papers yourself.
This technique is fun and easy, and it enables you to create various backgrounds, to make different cards.

I made the main background by stamping Snowflakesfrom Designs by Ryn on a leather textured red CS.


I also stamped the sentiment "Merry Christmas" on a scrap of the same red leather textured CS, and inked its edges using Platinum ink, the same ink I used to stamp the Snowflakes, to enhance it.
I also added 2 brads, all shiny and bright.
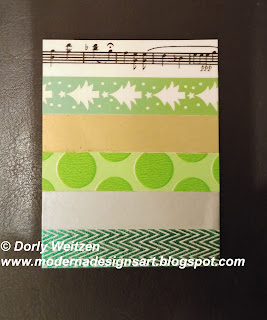
Then I used a piece of plain white CS, which I wrapped with several stripes of Washi Tape in Christmas related colors and themes.
You can use any combination of Washi Tape, I simply picked those which will pop out and will be contrasted to the red background. Once you're satisfied with the size of the wrapped CS, you can trim its edge off.

Here's the CS wrapped with Washi Tape:


And as Washi Tape sometimes has a tendency to become loose (it doesn't always stick to its place), I wrapped it behind both sides of the CS, and I adhered the 3D double sided foam tape on the back side of the CS exactly ON the Washi Tape's ends, so the foam tape secures them:


I stamped and heat embossed it on a scrap of the same red leather textured CS, then I cut it and added a few pearls for some more glam.
I adhered the Snowflakes background paper to the card basis, then the Washi Tape background paper and the decorated piece with the sentiment, using a double sided foam tape for a 3D effect.
I added the Christmas Tree on top of the Washi Tape background paper, also 3D. You can see it in 2 different color combos.

You can see the 3D effect here:


It sure feels like the right time to create Christmas Card.

We don't celebrate Christmas in Israel, but I'd like to send Christmas cards to my friends worldwide who celebrate Christmas.


Please let me know if you liked my tutorial, if it was clear (I'm always happy to answer questions), and if it made you want to create something similar.

(You can enlarge each photo by clicking on it) 
Thanks for stopping by, I hope you enjoyed. Have a creative day! Dorly

Wednesday, November 4, 2015

Seahorse and Fish Congratulations Card

I'm Card Captain of the enjoyMichaelStrongstamps Yahoo Group for this week, so for 5 days I'll be showing you several works using Michael Strong's stamps. I hope you'll find them inspiring.
My 3rd card for this week is a Seahorse and Fish Congratulations Card.


The red background paper is a leather textured CS.
I cut the 2 paper squares from my son's Scuba Diving license brochure, it had such a unique nautical themed pattern, I just had to re-use it.
I cut the Seahorse using Michael Strong Sea Horses Metal Die Cutter, it cuts like butter.
I colored the Seahorse using ProMarkers, and added a bling for its eye.

I added stamps, a used postal stamp with a colorful fish (it's a perfect match), and several pearls to add some glam.

(You can enlarge each photo by clicking on it) 
Thanks for stopping by, I hope you enjoyed. Have a creative day! Dorly

An Ocean of Fun and Adventure Card


I'm Card Captain of the enjoyMichaelStrongstamps Yahoo Group for this week, so for 5 days I'll be showing you several works using Michael Strong's stamps. I hope you'll find them inspiring.

My 2nd card for this week is An Ocean of Fun and Adventure Card.


My son just got his Scuba Diving license in the mail, so I simply had to recycle the lovely nautical themed paper which came with it.
I created the background by stamping over that paper, and added some Washi Tape and a postal stamp.
I stamped Michael Strong's Fish, heat embossed it and cut it, then I added a few pearls which seem like the bubbles coming out of its mouth.

Then I pearls and blings to add some glam.

(You can enlarge each photo by clicking on it) 
Thanks for stopping by, I hope you enjoyed. Have a creative day! Dorly

Friday, May 30, 2014

Wise Owl and Leaves Card

Here's another Michael Strong card in shades of green, using the Whimsical Owls stamp set.
I colored the Owl using ProMarkers, and glued it 3D to add some dimension.
The background was embossed with numbers, then colored and edged using Ranger Distress Inks.
I framed the dark green CS with faux stitches, using a white gel pen.
The leaves are a die cut.
The pearls enhance the Owl's eyes and also draw the corners, and - of course - add some glam.

I added Washi Tape with musical notes… will the Owl sing "Happy Birthday"?


(You can enlarge each photo by clicking on it) 

Thanks for stopping by, I hope you enjoyed. Have a creative day! Dorly

Friday, July 19, 2013

Michael Strong Sea themed Blog Hop - Canvas and Giveaway

Welcome to the Michael Strong Sea themed Blog Hop!


You must have arrived here from Shelly's Blog with her lovely artwork, showing what to do with the new release of Michael Strong Cloisonne Sea Turtle/Seaweed stamps.


As I don't have that stamp set yet, I used other sea themed Michael Strong stamps.
I created a Mixed Media canvas, using whichever sea themed supplies I had around.

Supplies used:
White canvas - 8X8 inches (20X20 cms)

Acrylic paints
Background sea themed paper - from a magazine
White paper and CS
Yellow CS
Orange CS
Manila CS
EKSuccess - Dotted Wave Edger Punch
Michael Strong Cloisonné Fish stamp (large)
Michael Strong Cloisonné Seastar stamp (small)
Michael Strong Cloisonné Shell stamp (small)
Washi Tape - colorful bubbles
Washi Tape - blue with white stripes and red dots
Embossing ink
Orange EP
VersaFine ink - Onyx Black
VersaFine ink - Vintage Sepia
ProMarkers
Yellow Stickles
Red Gem and golden metal large brad
White and light blue sticky back half pearls
Blings - in various colors and sizes
Diamond Glaze
3D double sided foam tape


I'm giving this canvas to my DH, and I have a very special wish for him.
The sentiment "If I had three wishes … my first would be for you" was printed on white paper, which was adhered to bright yellow CS punched using the EKSuccess - Dotted Wave Edger Punch.
I used the punched CS in 2 opposite directions.


To create the basic background, I colored the canvas using acrylic paints - black, green, light blue, red and yellow.
The coloring was meant to cover the canvas. Most of it will be covered later so the design wasn't important.

I left the edges of the canvas white on purpose, as I later covered them with Washi Tape with colorful bubbles all over it.
The bubbles fit into the sea (water) theme, and their bright colors add a vivid frame to the canvas.


Then I added the background sea themed paper, which was cut out of a magazine. It seems to fit here perfectly.
I added 2 stripes of Washi Tape - blue with white stripes and red dots, to match the sea waves and to coordinate with the other colors.
As you can see, all the stamped images were glued 3D for extra dimension.


Each stamped image was treated differently.

The Flower, which functions here as the sun, was stamped on white CS using VersaFine ink - Vintage Sepia, and was colored with ProMarkers.
I accented its inner circle using yellow Stickles, then I added a red gem and golden metal large brad to complete its hot, sunny appearance.


I stamped the Fish using Embossing ink on orange CS, then heat embossed it with orange EP.
I carefully cut it with scissors, and added a tiny turquoise bling as its eye.
I also added white sticky back half pearls, to resemble bubbles coming out of its mouth.


I stamped several images of the Shell and the Seastar on Manila CS, using VersaFine ink - Onyx Black.
I covered them with Diamond Glaze to give them a shiny look, and waited for them to dry.
I added each one of them a light blue sticky back half pearl, for decoration.

Finally, I added several blings in various colors and sizes, for extra glam.

Our summer is very hot and humid.
Oh, I wish I could stay in an air conditioned room all day and get creative! How about you?
For more inspiration, please hop to my friend Hetty's Blog where you'll find an adorable creative idea along with a tutorial.

Before you hop to your next step, please take a look here.
I'm offering a small Giveaway.


The Giveaway includes:
12 Crafty Individuals 6x6 patterned papers - Travel in Italy
Prima clear stamps - Travel
A bag of embellishments - ribbons, lace, flowers and real vintage buttons
Purple flower stickers
White paper doilies
Old book pages in Hebrew - printed in 1950!

In order to have a chance to win, all you have to do is leave a comment to this post, including your email address (so I can contact you).
I'll draw one lucky name next weekend. I will ship worldwide.
If you're a follower of my blog, either via email, Bloglovin or any other way, please mention it in your comment for an extra chance to win.
One comment per person, please.

Challenge
Heck of a Challenge - The Sea

(You can enlarge each photo by clicking on it)
Thanks for stopping by, I hope you enjoyed. Have a creative day! Dorly

Monday, May 27, 2013

Swimming Gold Fish Card

Here's a card I'm sharing as your Card Captain today for the enjoyMichaelStrongstamps Yahoo Group.
I made this clean and simple card for my swimming tutor.
She actually made me feel like a fish in the water (and also taught me another swimming style), and she asked for a hand-made card attached to her gift.
The Fish somehow seemed most appropriate.


Supplies used:
Cream CS for the card's basis
Orange paper from a magazine
Striped patterned paper from my stash
White CS for embossing
Dark orange leather textured CS for the Fish
Cuttlebug Embossing Folder - Distressed Stripes
Ranger's Distress Ink - spiced marmalade, faded jeans
Michael Strong Cloisonné Fish stamp
Embossing ink
Orange EP
White and orange Baker's Twine
White half pearls with sticky back
Double sided foam tape


I chose water themed colors to go along with the main motif - the Fish, and contrasting shades of orange to accent the blue.
I used Ranger's Distress Ink - spiced marmalade, to give the striped patterned paper a more distinct look by accenting its edges.
I used white CS with the Cuttlebug Embossing Folder - Distressed Stripes, and Ranger's Distress Ink - faded jeans, to create the blue background which resembles waves.
I layered the papers, tied a piece of white and orange Baker's Twine ,and then the Fish was glued 3D with foam tape for extra dimension.
I stamped Michael Strong's Cloisonné Fish on dark orange leather textured CS, heat embossed it with orange EP and cut it out using TH scissors.
I added several white half pearls, which resemble the water bubbles.


(You can enlarge each photo by clicking on it)
Thanks for stopping by, I hope you enjoyed. Have a creative day! Dorly

Friday, March 15, 2013

Happy Birthday Dragonfly Card

Here's my 5th card for this week as Card Captain at the enjoyMichaelStrongstamps Yahoo Group.

It's a birthday card in contrasting colors, with a flying dragonfly.


Supplies used:
Cream CS for the card's basis
Chocolate brown CS
Crafty Individuals patterned paper - Book 1
Light blue CS (from the white CS pack cover)
Vellum (Parchment) paper
Cuttlebug embossing folder - Polka Dot
Michael Strong Cloisonné Dragonfly Stamp (large)
Emboss Ink
Orange embossing powder
White half pearls with sticky back
Rub-on - the sentiment
Diamond Glaze
3D double-sided foam tape


I stamped Michael Strong's Cloisonné Dragonfly stamp on Vellum (Parchment) paper, using Emboss ink and orange EP, and heat embossed it.
I cut it with scissors and glued it with Diamond Glaze only in the center, so the wings seem to be flying in the air.
I layered the papers, adhered the CS with the rub-on sentiment 3D, and added white half pearls with sticky back for extra glam.


(You can enlarge each photo by clicking on it)
Thanks for stopping by, I hope you enjoyed. Have a creative day! Dorly