Showing posts with label yahoo group. Show all posts

Saturday, July 29, 2017

Michael Strong Black and White Blog Hop journaling page

Michael Strong Black and White Blog Hop journaling page

Welcome to the Michael Strong Black and White Blog Hop!

I hope you have arrived here from Lola Radnoti's blog: http://raevon59.wordpress.com/


My project is a double spread journaling page, in a regular sized notebook (A5).


For the background, I used a collage of randomly torn pages from a Mythology book which I saved from being thrown away – I upcycled it for a good purpose.

I also used a photo from the same book, showing a figure which seems to say "It'll be OK", very confidently.

I used Mike's Whimsical Owl stamp, heat embossed with an extra sparkly and shiny black EP, hand cut with scissors.


Here's a link to Michael Strong’s catalogue, where you can see all the wonderful stamps (and more) Mike has:
http://www.strongstamps.com/catalog-rubber-stamps-supplies/index.htm

The Washi Tape at the bottom of the page is actually a rather wide fabric tape.
It's directing the way to a one-way-ticket destination, leading to a positive and optimistic ending of the road, which goes along with the Sentiment.
The hand-written Sentiment is a very optimistic one.


The next blog you should hop to is Rosie Guiher's blog:
http://gramig05-playtime.blogspot.nl/

Please notice: if leave a comment in Mike’s blog, you may be lucky and win some blog candy stamps.

I missed blogging, and I'm glad to be back.

(You can enlarge each photo by clicking on it)
Thanks for stopping by, I hope you enjoyed. Have a creative day! Dorly


Sunday, March 20, 2016

The Key To My Heart Canvas

Here's my entry to the MS Winter Challenge, using the bare tree as required.
It's a Mixed Media canvas.
I thought of the tree as a Keys tree, where one of the keys may be the key to my heart...


Materials used:
20 x20 cms (8 x8 inches) canvas
DecoArt acrylic colors
Basic Grey patterned paper
Ancient Keys die cut by All Occasion Dies
Silver CS for the keys, which was the cover of a disposable baking tray
Red CS, for stamping the heart
Transparency sheet, for stamping the heart – 2nd layer
Andy Skinner's HAVE YOUR SAY stencil
Modeling paste
Red ProMarker
Ranger's Numbers Game stamp
VersaFine Onyx Black ink
Ranger's Fired Brick distress ink
Washi Tape
White Gel pen


Challenges

MS 2015/16 Winter Challenge

Designs By Ryn - March Customer Creation Challenge


(You can enlarge each photo by clicking on it) 
Thanks for stopping by, I hope you enjoyed. Have a creative day! Dorly

Wednesday, December 16, 2015

Vintage Letter Thank You Card

I'm Card Captain of the enjoyMichaelStrongstamps Yahoo Group for this week, so for 5 days I'll be showing you several works using Michael Strong's stamps. I hope you'll find them inspiring.

My 2nd card for this week is a Thank You card in Vintage colors, using a Kraft card basis and Kraft CS for the stamped sentiment, which is the dictionary definition of the word Todah (i.e. thank you, in Hebrew).

The patterned paper background paper is in shabby chic style, and the patterned paper used for the Rosette was designed with old letters and post cards.


I stamped it on a contrasting light blue paper using VersaFine Ink - Black Onyx, and cut it using Michael Strong's Mini Wings Metal Die Cutter Set -  they are so easy and fun to use!


I also used Tim Holtz Rosette (large) with a snowflake on top of it, which was cut out of a Vintage patterned paper, as a tribute for Christmas and for a dramatic 3D look.
Both the Rosette and the stamped tag with the sentiment were inked all around, to give them a distinct, eye-catching frame.

I glues the Rosette, The sentiment and the Hummingbird 3D, and added several colorful blings.

You can enlarge each photo by clicking on it) 
Thanks for stopping by, I hope you enjoyed. Have a creative day! Dorly

Tuesday, December 15, 2015

Japanese Fan and Flowers Card

I'm Card Captain of the enjoyMichaelStrongstamps Yahoo Group for this week, so for 5 days I'll be showing you several works using Michael Strong's stamps. I hope you'll find them inspiring.

My 1st card for this week is a Christmas card in non-traditional colors, using Japanese themed elements.


I used Michael Strong's Cloisonné Silhouette Fan stamp (medium) from the Cloisonné Silhouette Fan set.
I heat embossed it in white, and accented it with colorful blings.


I also used Tim Holtz Snowflake Rosette for a dramatic 3D look.
I think it actually makes everything pop out!


(You can enlarge each photo by clicking on it)
Thanks for stopping by, I hope you enjoyed. Have a creative day! Dorly

Friday, November 6, 2015

Merry Christmas Card with Washi Tape and Christmas Tree with Tutorial

I'm Card Captain of the enjoyMichaelStrongstamps Yahoo Group for this week, so for 5 days I'll be showing you several works using Michael Strong's stamps. I hope you'll find them inspiring.

My 4th card for this week is a Merry Christmas Card with Washi Tape and 
Christmas Tree.

It is followed by a step-by-step tutorial, with photos.

I hope you'll try it and enjoy it… It takes less time to make the card than to post 
about it (lol)


Today's card is all about making the background papers yourself.
This technique is fun and easy, and it enables you to create various backgrounds, to make different cards.

I made the main background by stamping Snowflakesfrom Designs by Ryn on a leather textured red CS.


I also stamped the sentiment "Merry Christmas" on a scrap of the same red leather textured CS, and inked its edges using Platinum ink, the same ink I used to stamp the Snowflakes, to enhance it.
I also added 2 brads, all shiny and bright.
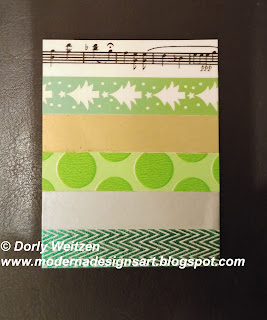
Then I used a piece of plain white CS, which I wrapped with several stripes of Washi Tape in Christmas related colors and themes.
You can use any combination of Washi Tape, I simply picked those which will pop out and will be contrasted to the red background. Once you're satisfied with the size of the wrapped CS, you can trim its edge off.

Here's the CS wrapped with Washi Tape:


And as Washi Tape sometimes has a tendency to become loose (it doesn't always stick to its place), I wrapped it behind both sides of the CS, and I adhered the 3D double sided foam tape on the back side of the CS exactly ON the Washi Tape's ends, so the foam tape secures them:


I stamped and heat embossed it on a scrap of the same red leather textured CS, then I cut it and added a few pearls for some more glam.
I adhered the Snowflakes background paper to the card basis, then the Washi Tape background paper and the decorated piece with the sentiment, using a double sided foam tape for a 3D effect.
I added the Christmas Tree on top of the Washi Tape background paper, also 3D. You can see it in 2 different color combos.

You can see the 3D effect here:


It sure feels like the right time to create Christmas Card.

We don't celebrate Christmas in Israel, but I'd like to send Christmas cards to my friends worldwide who celebrate Christmas.


Please let me know if you liked my tutorial, if it was clear (I'm always happy to answer questions), and if it made you want to create something similar.

(You can enlarge each photo by clicking on it) 
Thanks for stopping by, I hope you enjoyed. Have a creative day! Dorly

Wednesday, October 7, 2015

Winged Fairy Halloween Card

I'm Card Captain of the enjoyMichaelStrongstamps Yahoo Group for this week, so for 5 days I'll be showing you several works using Michael Strong's stamps. 
I hope you'll find them inspiring.

My 3rd card for this week is a Winged Fairy Halloween Card.


It's another very detailed card in typical Halloween colors, made with some help from my dear friend Kelli Green.


I used Michael Strong's Cloisonné Leaves stamp (large), which I stamped on a transparent sheet and cut the leaves, and then I adhered them using a transparent double sided tape, so that the Fairy seems to be flying with her wings in the air.
Actually, she's supposed to be a witch… but she's too cute for that, isn't she?

You can see the 3D effect when looking at the card from a different angle.


I also stamped both sides of the envelope, leaving space for the address and postal stamps.

I hope you got some more Spooky Halloween inspiration!


(You can enlarge each photo by clicking on it) 
Thanks for stopping by, I hope you enjoyed. Have a creative day! Dorly

Tuesday, October 6, 2015

Spooky Pot Fairy Halloween Card

I'm Card Captain of the enjoyMichaelStrongstamps Yahoo Group for this week, so for 5 days I'll be showing you several works using Michael Strong's stamps. I hope you'll find them inspiring.

My 2nd card for this week is a Spooky Pot Fairy Halloween Card.


It's a very detailed card in typical Halloween colors, made with some help from my dear friend Kelli Green.


I used Michael Strong's Cloisonné Pot stamp (large), which I heat embossed and cut, and then turned it upside down, so that the Fairy seems to be emerging out of the container.


Actually, she's supposed to be a witch… but she's too cute for that, isn't she?
You can see the 3D effect when looking at the card from a different angle.


I also stamped both sides of the envelope, leaving space for the address and postal stamps.

I hope you got some Spooky Halloween inspiration!


(You can enlarge each photo by clicking on it) 
Thanks for stopping by, I hope you enjoyed. 
Have a creative day! Dorly